Vacuum sealing makes food preservation easier and healthier. The sealing process is one of the incredible options to store wet, dry or non-perishable food items in a dry, cool place with proper hygiene. Whether you’re an expert or a newbie at preserving bulk food or leftovers in your refrigerator, the trick to sealing is relatively a new revelation.
Every day brings a new challenge, especially if you are used to storing large quantities of food, at the same time, you do not have enough space to store in your kitchen refrigerator, but now there are many appliances available that make your work easy, i.e. mason jars.
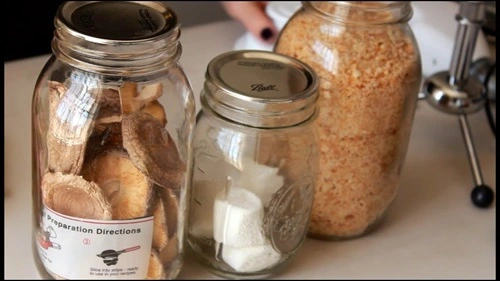
Vacuum sealing equipment can have great impact on the food preservation and food storage, and prolong the storage period of dry and wet food. Vacuum sealing is used to seal food in canisters, jars or bags for marinating and storing food preparation items. Among all, jarring is the most traditional technique used by many to store dry snacks, nuts, cookies, and more. However, vacuum sealing now gives you more options.
Mason jars have become a popular choice among numerous home preserves due to their ease of use and versatility. In this article, we will introduce you to how to vacuum mason jars by following the given steps. Also, we have mentioned here some of the major tips related to the food preserving method.
Steps to follow for Vacuum Sealing Mason Jars:
Most of you have queries regarding how to keep preserved food fresher & healthier in the mason jars. You should be familiar with the vacuum sealing process. In this section, to introduce you to vacuum sealing Mason jars, we have prepared a step-by-step guide. Keep scrolling to check out the easy steps
Sterilizing and Cleaning is must to done first
Before using a mason jar to store items, make sure it is thoroughly cleaned and sterilized. Preparing the jar by cleaning and sterilizing means you are taking safety precautions. You can run them through a very hot dishwasher or boil them. When boiling, place them in a container with water that covers the jar well, and let it boil.
Reduce the heat to a bubble and leave it until you are ready to use them. Don’t forget to clean the lids as well. Once cooled, pack the jars and close the lid. Before re-using a mason jar, even if brand new, clean and sterilize jars by boiling in-home water for at least 10 to 15 minutes.
Attain the essential items: For the vacuum seal process, you will need a vacuum pack device. You will also require a glass jar sealing hose for the vacuum sealer, a unique type of machine that fits over glass jars. This enables you to vacuum seal your jar.
Attaching a jar-sealing accessory
A jar sealer accessory is a special type of sealer attachment. You need to attach the lid to your jar, not the ring. Attach the rings after the sealing process is complete. Attach the jar sealer accessory to the peak of the flat lid.
The jar sealer attachments have two versions: a wide mouth Mason jar attachment and a regular Mason jar attachment. Premium-grade jar sealer attachment packages come with both of these attachments. Check that the attachment is in place so it doesn’t fall when you start vacuuming the jar.
Connecting the exhaust hose
After attaching the attachment to the jar, you need to add the air exhaust hose. The hose should be well attached to the vacuum sealer on one side and the jar sealer attachment on the other. For most vacuum sealers, there is a special hose attachment available on the market.
Turn on the Vacuum Sealer
You can operate the jar as per your particular device instructions. You can simply turn on the device until the machine shows that the jar will seal off. When the process is complete, you should hear the sound of lid cracking. The machine can also show that the process is completing through a signal such as a green light.
Completion of jar selling
The device will automatically shut off once the oxygen is eliminated. Note that perishables will still need to be kept in the freezer or fridge. Don’t forget to remove the hose from the sealing attachment. Also, take away the sealing accessory from the jar. Later screw the ring tightly onto the jar, and later store it in a cool, dry place.
Another method for vacuum sealing mason jars
A vacuum canister and an accessory port are two substitutes to vacuum seal mason jars. They work well for re-using regular glass jars. When it comes to modern vacuum sealing machines, you will see that most of them have an accessory port. As an added accessory, you can purchase a vacuum hose attachment.
- First of all, fill your jar.
- Attach the lid and droopily screw on the outer band.
- Keep your jar in the canister and add the lid.
- Attach the vacuum hose to the accessory port and canister.
- To seal the jar, twist the dial on the canister.
- Turn on your vacuum sealer and leave it to work through its process.
- Once completed, tighten the outer ring and remove the jar.
Things to keep in mind
- The objective of vacuum sealing is to suck air from food. If you have difficulty using your vacuum sealer, use a handheld pump and an oxygen absorber to eliminate air from the jar for seal-off.
- If you have difficulties with vacuum sealing mason jars, use both wide-mouth jar sealers of regular-sized jar sealers,. Attach one of the above to the other, then add the hose attachment to the sealer. This way, regular-sized sealer will seal the lid while the wide-mouth one holds it in place.
- If you want to store your food in a canning jar, use pressure canners, instead of vacuum sealers.
- Buy a regular-sized and wide-mouth jar sealer if you need to seal jars of different sizes.
Wrap Up!
I hope that through this article, you will get all the answers regarding preserving food in mason jars through vacuum sealing.
Hina Abbasi is Editor and a passionate sports and entertainment content writer at WinnersMaze.com. Hina’s expertise spans across a wide range of sports, and interest in many TV shows allowing her to deliver insightful analysis and compelling stories that resonate with readers.